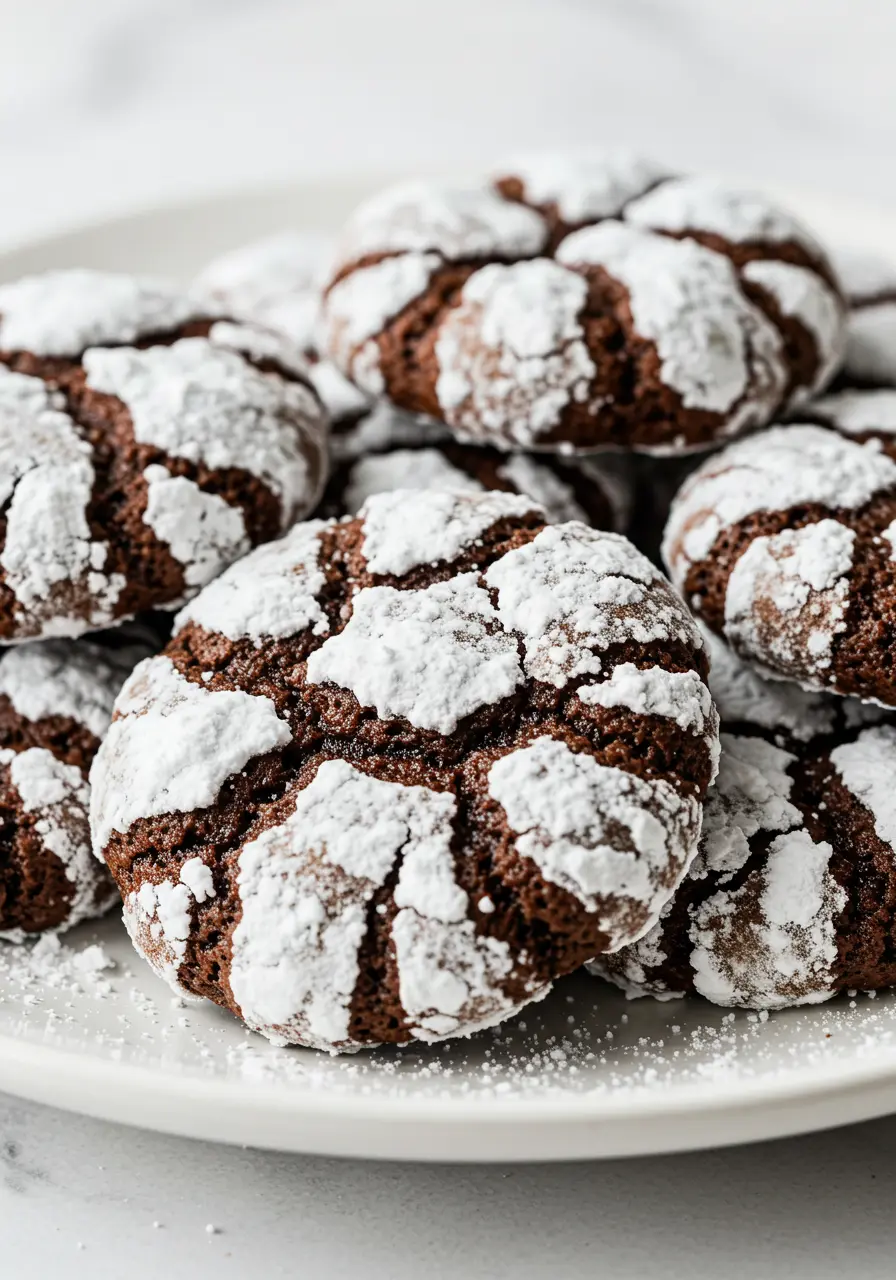
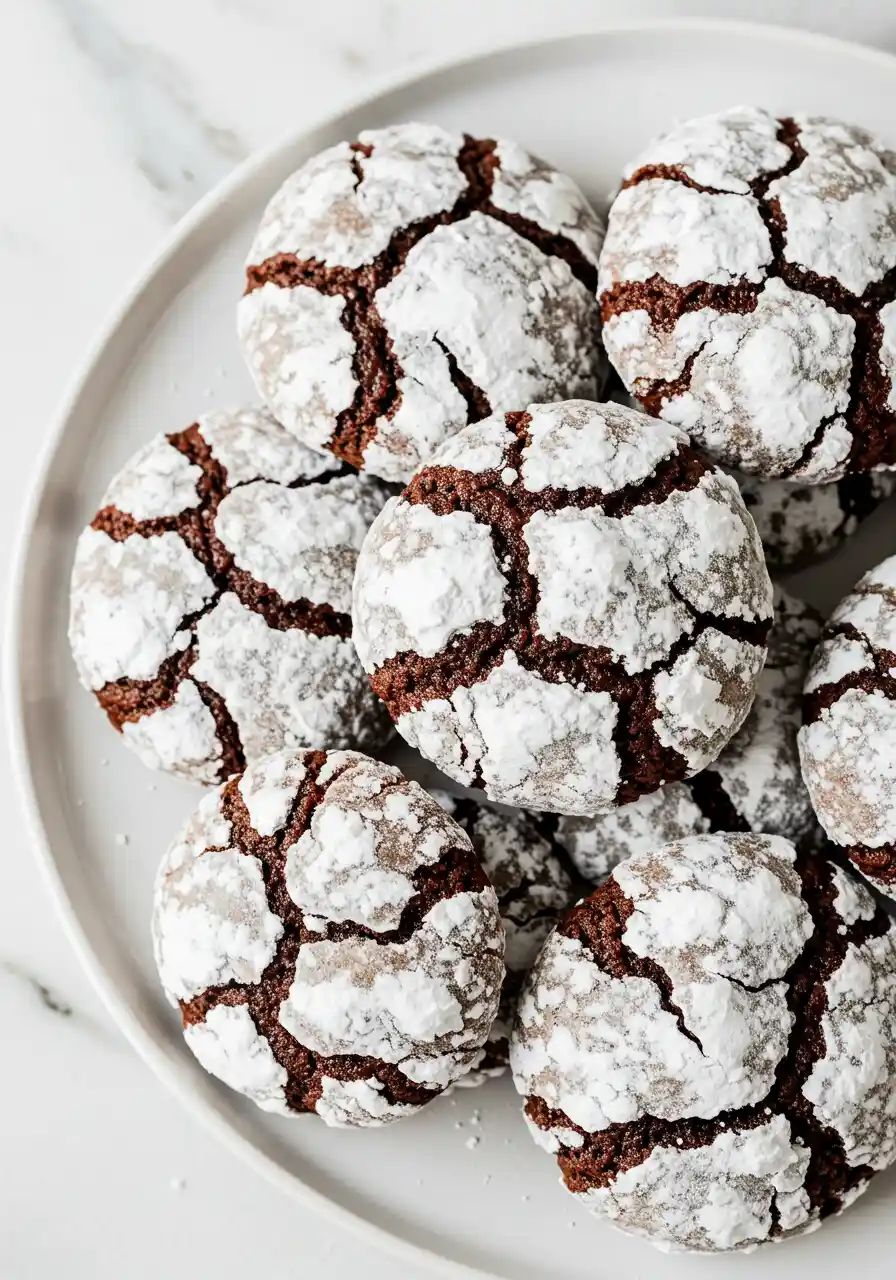
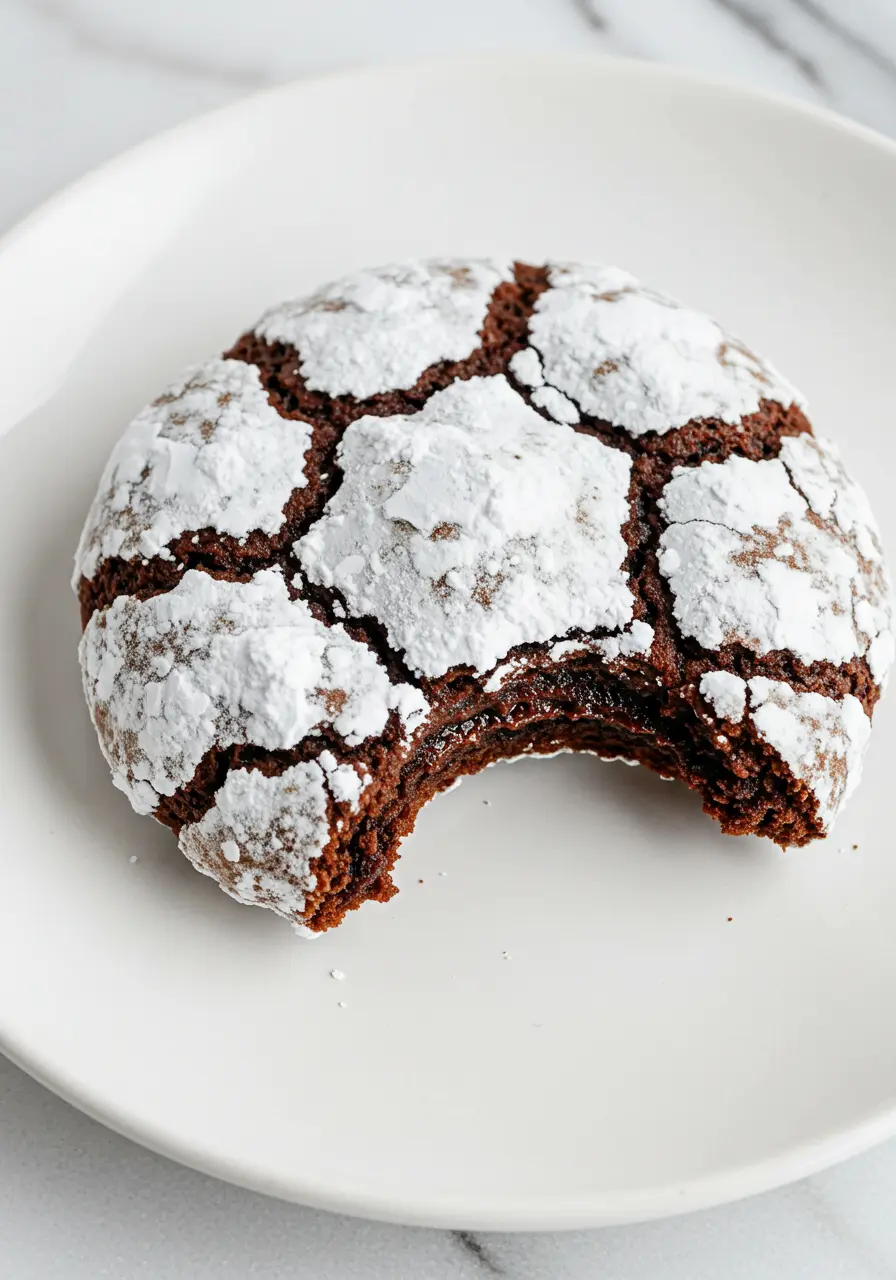
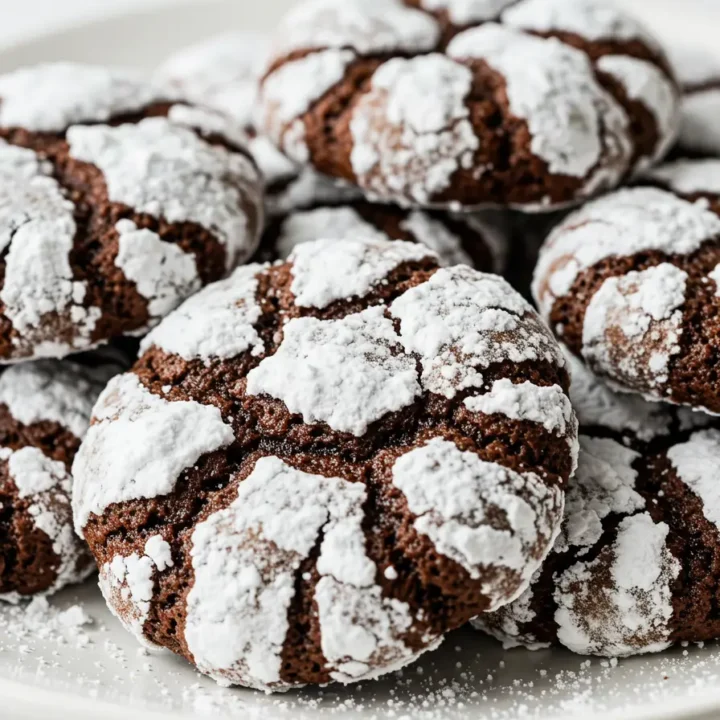
If you’ve ever bitten into a warm, soft cookie and felt that perfect mix of sweetness and cocoa goodness, you know exactly what I mean. These cookies are everything, crispy on the outside with that chewy, melt-in-your-mouth center. But the best part? The signature crinkled top. That’s what makes Chocolate Crinkle Cookies so special, and it’s the perfect balance of texture and flavor.
I first came across this recipe on Pinterest one evening while searching for something new to bake. The photos of those beautifully cracked, chocolatey cookies instantly caught my eye, and I couldn’t resist trying them out.
The moment they came out of the oven, filling my kitchen with that irresistible, warm chocolate aroma, I knew these were going to be a new favorite.
Jump to
If you’re a fan of crinkle cookies, be sure to check out my lemon crinkle cookies for a zesty twist on this classic treat!
Why You’ll Love These Chocolate Crinkle Cookies:
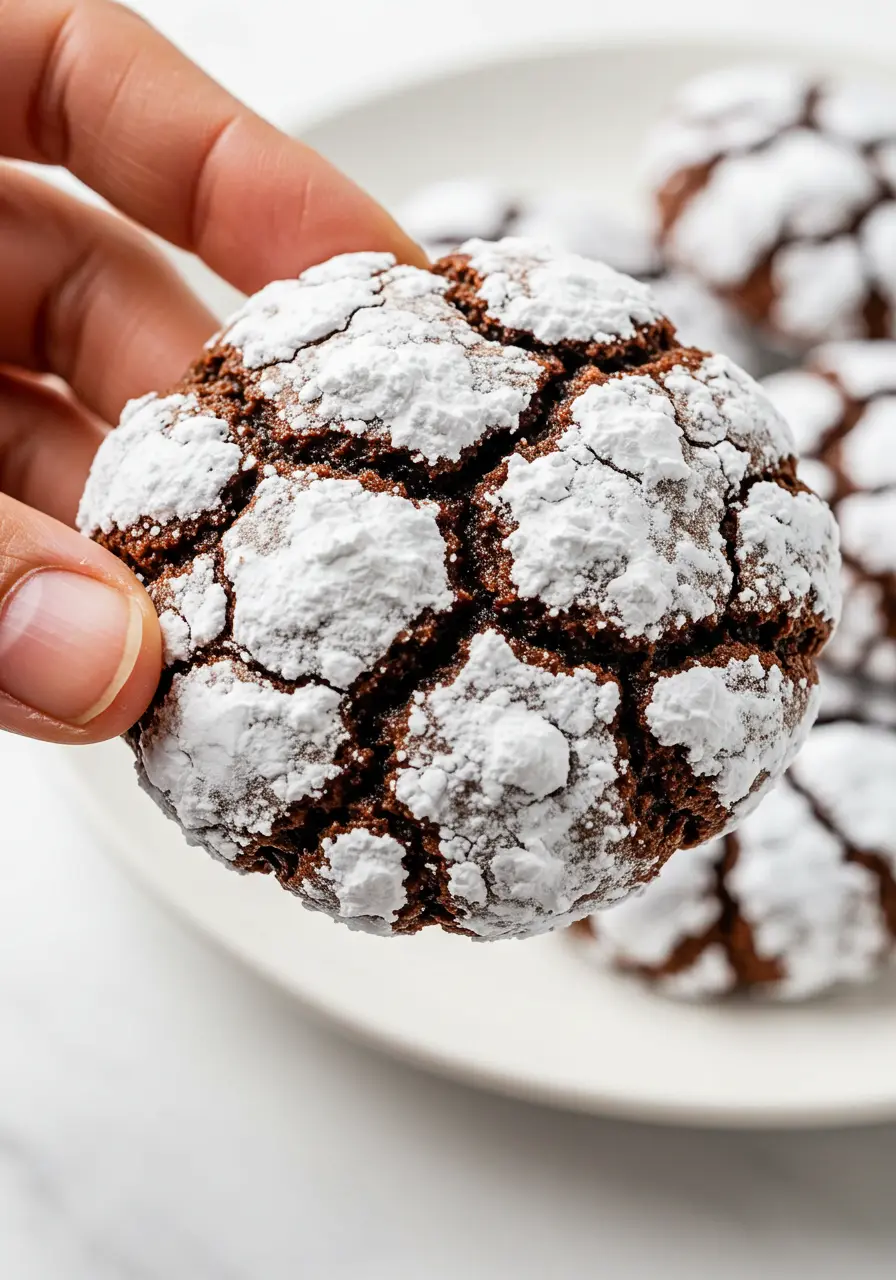
- Perfect Texture: That signature crinkle on top? It’s not just for looks, it’s the magic that makes these cookies chewy on the inside with just the right amount of crispiness on the outside. Every bite offers the ideal harmony of textures, soft, chewy, and perfectly satisfying!
- Simple & Quick: No need to be a baking pro to nail these! With easy-to-follow ingredients and a quick prep time, you’ll have a batch of warm, gooey cookies in no time. You’ll be surprised at how incredibly delicious something so simple can be.
- Great for Sharing: Want to impress friends and family? These cookies are a crowd-pleaser! The moment they see the crinkled, powdered-sugar-dusted cookies, they’ll know you’re about to share something special.
The Ingredients You’ll Need:
- Granulated Sugar: The base sweetness that makes these cookies smooth and perfectly sweet.
- Brown Sugar: Adds moisture and a rich, caramel-like flavor to your cookies.
- Vegetable Oil: Keeps the cookies soft and chewy without being greasy.
- Dark Cocoa Powder: Gives your cookies that deep, rich chocolate flavor.
- Eggs: Bind everything together and create that chewy texture.
- Vanilla Extract: Enhances the flavors and adds a warm, sweet aroma.
- All-Purpose Flour: Provides structure while keeping the cookies soft and tender.
- Baking Powder: Helps the cookies rise and get that perfect chewiness.
- Salt: It cuts through the sweetness and enhances the rich chocolate depth.
- Powdered Sugar: For rolling your cookies and creating that beautiful crinkle effect.
Note: This is just a quick rundown of the ingredients I used and why, to find all the details and measurements, simply scroll down to my recipe card!
How to Make Chocolate Crinkle Cookies
Prepare the Wet Ingredients
Start by grabbing your stand mixer (or hand mixer, no worries if you don’t have the fancy stuff). In the bowl, combine the granulated sugar, brown sugar, and vegetable oil.
Blend the ingredients until the mixture is silky smooth and thoroughly combined. You want a nice, creamy base for your dough.
Next, add the eggs one at a time, making sure each is fully incorporated before adding the next.
Don’t forget the vanilla extract, this little splash will add warmth and elevate all the flavors! Mix everything until you have a smooth, velvety batter.
Add the Dry Ingredients
Next up, it’s time to mix in the dry ingredients. Begin by mixing the dark cocoa powder, all-purpose flour, baking powder, and salt into the bowl. Mix slowly at first to avoid a cloud of cocoa powder (we’ve all been there!).
Gradually increase the speed until everything comes together into a thick dough. Don’t be alarmed if the dough feels a little stiff, that’s exactly what you want!
Chill the Dough
This step is essential for the perfect crinkle effect. You’ll need to chill the dough in an airtight container, either in the fridge for at least 4 hours or, if you’re planning ahead, overnight works wonders too.
Chilling the dough not only makes it easier to roll but helps the cookies maintain that lovely chewy center with the perfect crinkle top.
Preheat and Prep Your Baking Sheet
While the dough chills, go ahead and preheat your oven to 350°F (175°C). Line a baking sheet with parchment paper. Trust me, this will help your cookies bake evenly and come off the tray without sticking.
Roll and Coat the Dough
Once your dough is chilled and ready to go, grab a tablespoon (or a trusty 1 ½ tablespoon scoop) and scoop out some dough. Roll each portion into a ball.
Now, here’s where the magic happens, roll each dough ball in powdered sugar, making sure it’s completely coated. This step is key for that signature crinkled look and a light, sweet crunch on the outside. Don’t be shy with the powdered sugar!
Bake the Cookies
Arrange the dough balls on the prepared baking sheet, leaving about 2 inches of space between each. Pop them into the preheated oven and bake for 10-11 minutes.
You’ll start to see those crinkles form on top as they bake, and the smell will be absolutely mouthwatering. Don’t worry if the cookies seem soft when they come out, that’s how they stay chewy inside!
Let Them Cool (But Not for Too Long!)
After taking them out of the oven, allow the cookies to rest on the baking sheet for around 5 minutes. This helps them set up just right.
Then, place the cookies on a cooling rack to cool down fully. The longer they rest, the chewier their texture becomes!
Loved this? There’s so much more to explore! Follow me on Pinterest for tasty recipes and baking inspiration and be sure to pin this one for later!
Easy Mistakes to Avoid for Perfect Cookies
Don’t Skip the Chilling Time
I get it, waiting isn’t easy, but trust me, chilling the dough makes all the difference! If you skip this step, the dough won’t hold its shape as well when baked, and your cookies might spread too thin.
Chilling the dough helps achieve that chewy center and the signature crinkle top. So, pop it in the fridge for at least 4 hours (or overnight, if you can wait that long!).
Don’t Overmix the Dough
After adding the dry ingredients, mix gently, just until everything is combined to avoid overmixing.
The more you mix, the tougher the cookies get. You want just enough mixing to combine everything, but it doesn’t need to be super smooth. Less is more here, so aim for a thick, lumpy dough that’s ready to be rolled.
Don’t Use Cold Eggs or Oil
If your eggs and oil are cold from the fridge, they won’t blend as well with the rest of the ingredients.
Be sure your eggs are at room temperature before mixing them into the batter. Cold ingredients can cause the batter to separate, and we want a smooth, even dough.
How to Store Chocolate Crinkle Cookies
- Keep Them Sealed- Pop your cookies in an airtight container to keep them soft and chewy for up to 5 days. No fancy storage needed, just sealed tight!
- Layer with Love- If you’re stacking them, place parchment paper between the layers to preserve the crinkles.
- Freeze for Later- Got extras? You can freeze the dough balls or baked cookies for up to 3 months to preserve their freshness. When you’re ready, just thaw and snack away!
- Room Temp Is Key- Keep them at room temperature to maintain the ideal texture. The fridge can make them a bit too firm.
Did you try making this recipe? It will make me so HAPPY if you rate it⭐ and share your thoughts in the comments section below!
Ultimate Chocolate Crinkle Cookies : Super Easy
If you’ve ever bitten into a warm, soft cookie and felt that perfect mix of sweetness and cocoa goodness, you know exactly what I mean. These cookies are everything, crispy on the outside with that chewy, melt-in-your-mouth center. But the best part? The signature crinkled top. That’s what makes Chocolate Crinkle Cookies so special, and it’s the perfect balance of texture and flavor.
Ingredients
- ½ cup dark cocoa powder
- 2 large eggs
- 1 teaspoon vanilla extract
- 1 cup all-purpose flour
- ¼ cup powdered sugar (for rolling)
- 1 teaspoon baking powder
- ¼ cup brown sugar
- ¾ cup granulated sugar
- ¼ teaspoon salt
- ¼ cup vegetable or canola oil
Instructions
- Start by mixing the granulated sugar, brown sugar, and vegetable oil in the bowl of your stand mixer (or use a hand mixer if that’s what you have).
- Blend everything together until it’s smooth and creamy. Add the eggs individually, ensuring each one is completely mixed in before adding the next. Don’t forget the vanilla extract! Mix until everything is smooth and velvety.
- Next, it's time to add the dry ingredients. Slowly incorporate the dark cocoa powder, all-purpose flour, baking powder, and salt into the bowl.
- Start mixing slowly to avoid a cocoa cloud, then increase the speed until everything comes together into a thick dough. Don’t worry if the dough feels a little stiff, that’s perfect!
- Now, chill the dough! This is an important step to get those perfect crinkles. Place the dough in an airtight container and refrigerate for at least 4 hours, or overnight if you have the time.
- As the dough chills, preheat your oven to 350°F (175°C) and line a baking sheet with parchment paper. This will help your cookies bake evenly and come off the sheet easily.
- When your dough is chilled, grab a tablespoon (or a 1 ½ tablespoon scoop) to portion out the dough. Shape each piece into a ball, then roll them thoroughly in powdered sugar. This is what gives the cookies their signature crinkled look and a sweet, crunchy exterior.
- Arrange the dough balls on the prepared baking sheet, ensuring there’s a 2-inch gap between each.
- Put them in the preheated oven and bake for 10 to 11 minutes. As they bake, you’ll see the crinkles start to form. Don’t be worried if they seem soft when they come out; that’s what keeps them chewy!
- Let the cookies cool on the baking sheet for about 5 minutes to set. Once done, transfer them to a cooling rack to cool completely. The longer they rest, the chewier they become!
Notes
- If your cookies are too soft when you take them out of the oven, no worries, they'll firm up as they cool.
- Ensure your oven is completely preheated before baking to guarantee the cookies bake evenly.
- For an added crinkle, sprinkle a pinch of salt into the powdered sugar!
Nutrition Information:
Serving Size: 1 cookieAmount Per Serving: Calories: 170Saturated Fat: 8gCholesterol: 20mgSodium: 50mgCarbohydrates: 22gFiber: 1gSugar: 14gProtein: 1.5g
Nutritional information is provided as a general guideline and is calculated using standard online tools. Variations may occur depending on the specific ingredients and methods used.