I still remember the first time I baked a White Velvet Cake. I was on a mission to find the perfect vanilla-based cake, something softer than classic vanilla cake, richer than a sponge cake, and with a melt-in-your-mouth texture that made every bite feel like a dream.
After experimenting with different techniques, I finally landed on a recipe that delivered everything I was looking for. And let me tell you, this cake is pure magic.
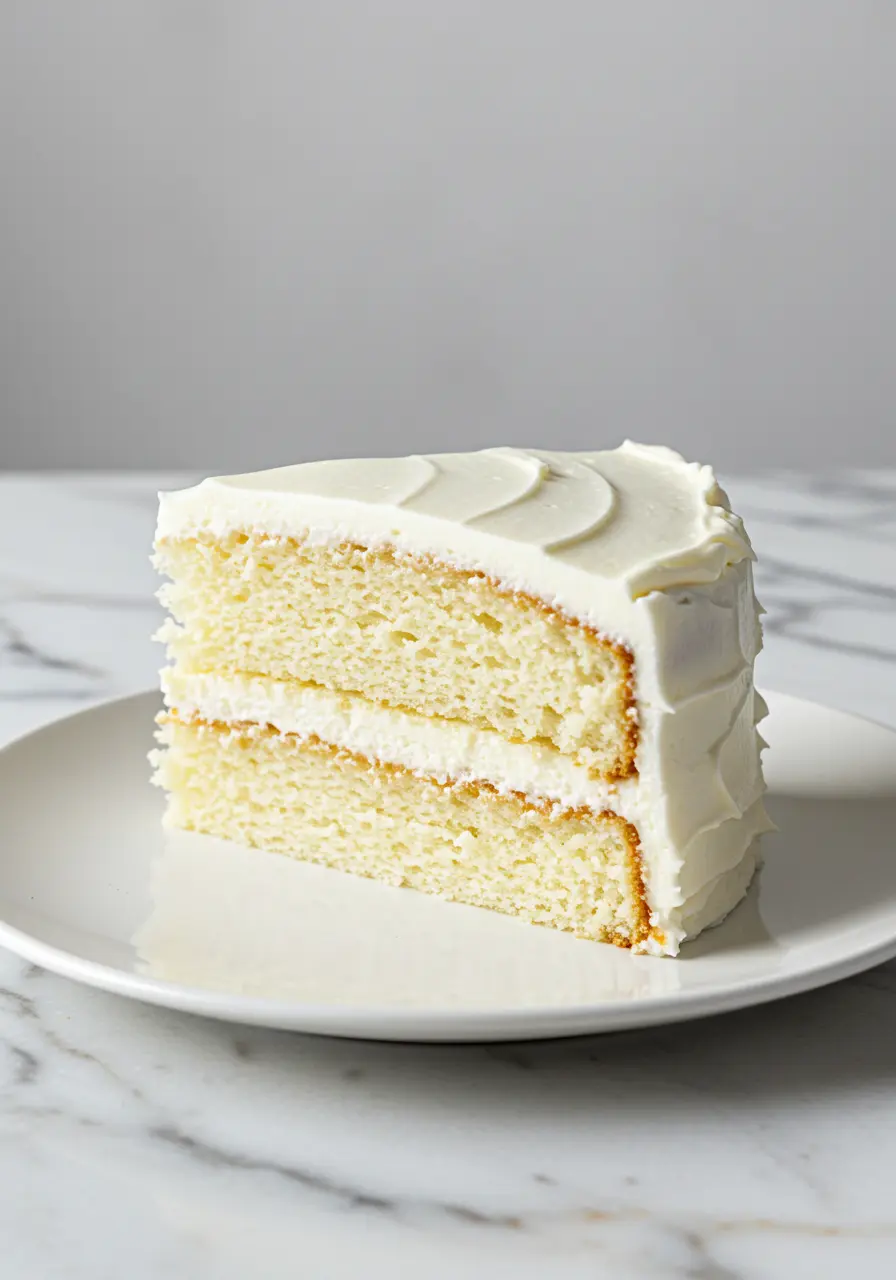
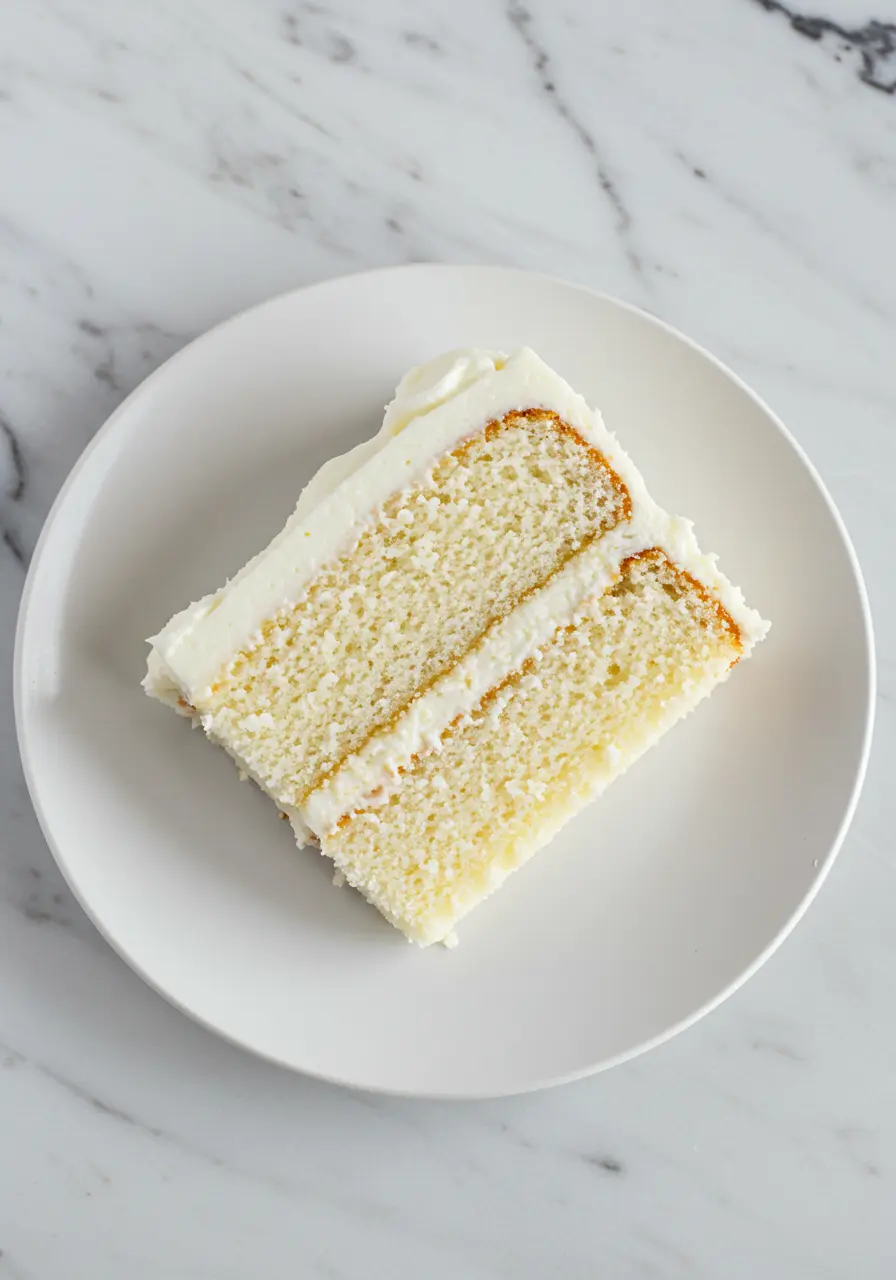
What sets white velvet cakes apart from regular vanilla cakes is their incredibly soft, pillowy texture. Every bite is rich, buttery, and impossibly tender.
And when you pair it with a smooth, creamy buttercream frosting, you get a cake that’s not just delicious but absolutely unforgettable.
Jump to
Whether you’re celebrating a birthday, hosting a brunch, or just craving a slice of something special, this is the white velvet cake recipe you’ll want to save and make again and again.
The Ingredients You’ll Need
- Unsalted Butter: Adds richness and moisture to the cake, helping create a tender crumb.
- Sugar: Sweetens the cake and contributes to its soft, moist texture.
- Egg Whites: Provide structure and stability, creating a light and airy texture for the cake.
- All-Purpose Flour: The main building block for the cake, giving it structure and texture.
- Baking Powder: Gives the cake a lift, creating a soft and airy texture.
- Salt: Boosts the overall taste and keeps the sweetness in check.
- Almond Extract: Adds a subtle, nutty flavor that complements the vanilla for a deliciously unique taste.
- Vanilla Extract: Offers a warm, aromatic flavor that deepens the overall taste of the cake.
- Milk: Adds moisture and helps create a smooth, tender crumb.
- Vegetable Oil: Provides additional moisture and softness without altering the flavor.
- Pasteurized Egg Whites: Stabilize the frosting and give it a light, airy texture.
- Powdered Sugar: Sweetens and thickens the frosting, giving it the perfect consistency.
Note: This is just a quick rundown of the ingredients I used and why, to find all the details and measurements, simply scroll down to my recipe card!

How to Make White Velvet Cake
Start by Preheating the Oven & Preparing the Pans
Preheat your oven to 335ºF (about 170ºC), and get your two 8-inch round cake pans ready.
You can either grease them with butter and dust them lightly with flour, or go for the no-fail option of using a cake goop (a mix of flour, oil, and shortening). It’s all about making sure the cakes come out of the pan smoothly once they’re baked!
Mix the Wet Ingredients Together
In a separate bowl, combine your milk, vegetable oil, and vanilla and almond extracts. Mix them well, then set the mixture aside for later.
We’re just getting this part ready so when we move on to the dry ingredients, everything will be smooth sailing.
Combine the Dry Ingredients
In another bowl, sift together your all-purpose flour, baking powder, and salt. This step is super important because it ensures the baking powder is evenly distributed and that there are no lumps in your flour.
A good sift will give you a lighter, fluffier cake.
Cream the Butter & Sugar
Now, this is where the magic begins! Place your softened unsalted butter into the stand mixer (or a hand mixer will work too). Mix it on medium speed until it’s smooth and creamy.
Add in your sugar and let it whip on high for about 5 minutes, until the mixture is light, airy, and almost white. You’re looking for a pale, fluffy texture here , this is going to help create that beautiful, tender crumb.
Incorporate the Egg Whites Slowly
Once your butter and sugar are beautifully fluffy, start adding your egg whites one at a time.
Keep the mixer on low and let each egg white fully incorporate before adding the next.
If your egg whites are too cold, they might not mix well, so make sure they are at room temperature.
Alternating the Dry & Wet Ingredients
Next, it’s time to bring everything together. Start by adding about one-third of your dry ingredients to the butter mixture. Mix on low just until combined.
Now, add half of your wet ingredients (the milk-oil-extract mixture), and mix again until it’s just combined.
Add another third of the dry ingredients, followed by the rest of the wet ingredients, and then finish with the remaining dry ingredients.
Take it easy here , we don’t want to overmix the batter. Just stir until everything is combined.
Prepare for Baking
Once the batter is ready, evenly divide it between your prepared cake pans. Give the pans a gentle tap on the counter to level out the batter.
Pop them into the preheated oven and bake for 25 to 35 minutes, or until a toothpick inserted into the center comes out clean.
The cake should have a slight golden color on top, and it’ll smell irresistible!
Cooling Time
Once baked, let your cakes cool in the pans for about 10 minutes. After that, carefully flip them onto a cooling rack to cool completely.
This cooling step is super important, it helps the cakes firm up and makes frosting them a lot easier.
How to Make Buttercream Frosting
While your cakes are cooling, let’s make the frosting! In a stand mixer, combine your pasteurized egg whites and powdered sugar. Whisk them together on low speed until they’re fully combined.
Then turn the speed up to high and let it whip until it’s nice and frothy.
Next, start adding your unsalted butter in small chunks while the mixer is running on high. Be patient with this step , don’t rush it! Once the butter is fully incorporated, add your salt and vanilla extract.
Whip it all together until the frosting is light, fluffy, and smooth.
Frost the Cake
Now that everything is cooled down, it’s time to put it all together! Place one of your cakes on a serving plate or cake stand.
Here’s a little tip: I usually like to trim off the thin, slightly browned top and bottom layers of the cake before frosting.
This helps ensure a smoother, cleaner finish for the frosting and gives the cake a more even appearance. Once that’s done, spread a generous amount of frosting over the top, smoothing it out evenly.
Carefully place the second cake layer on top and gently press down so it sticks.
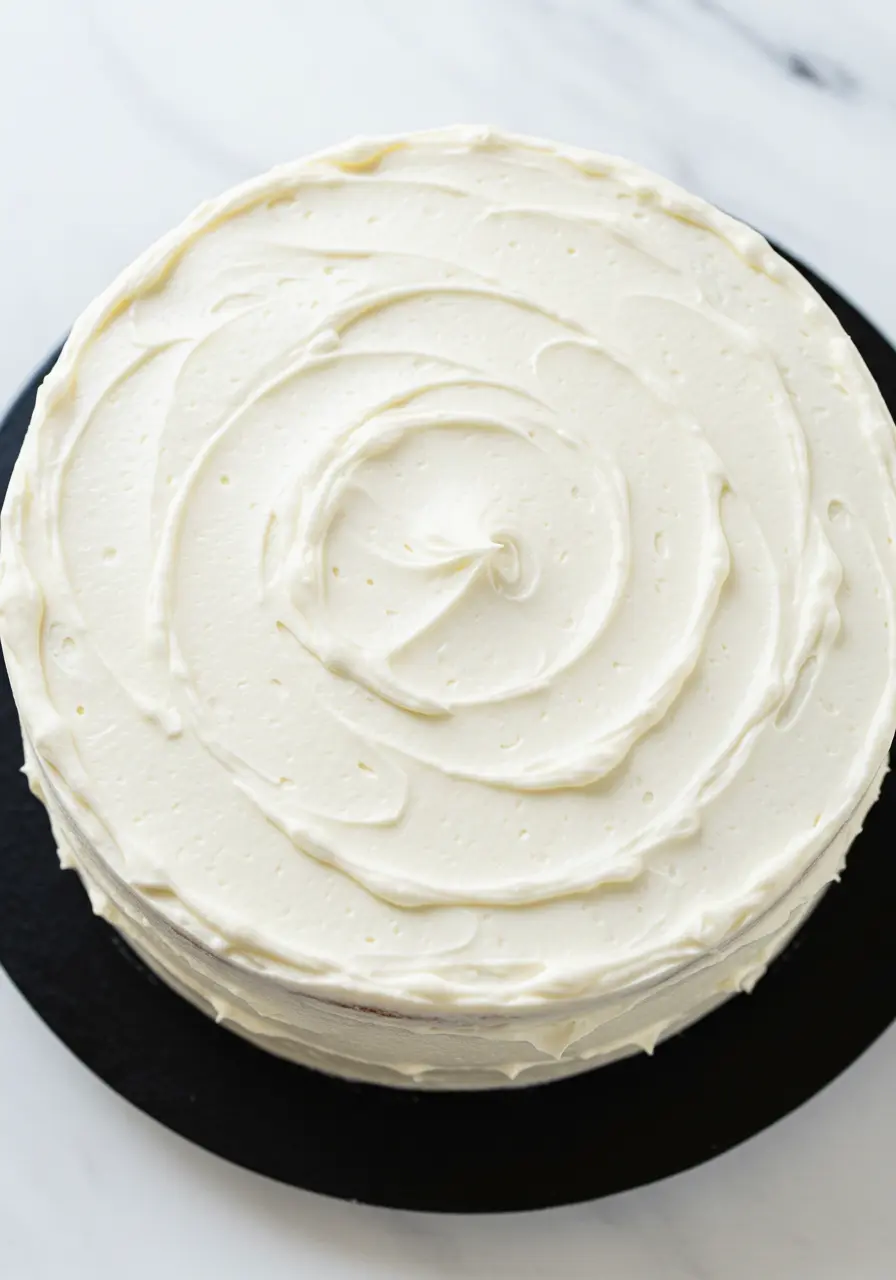
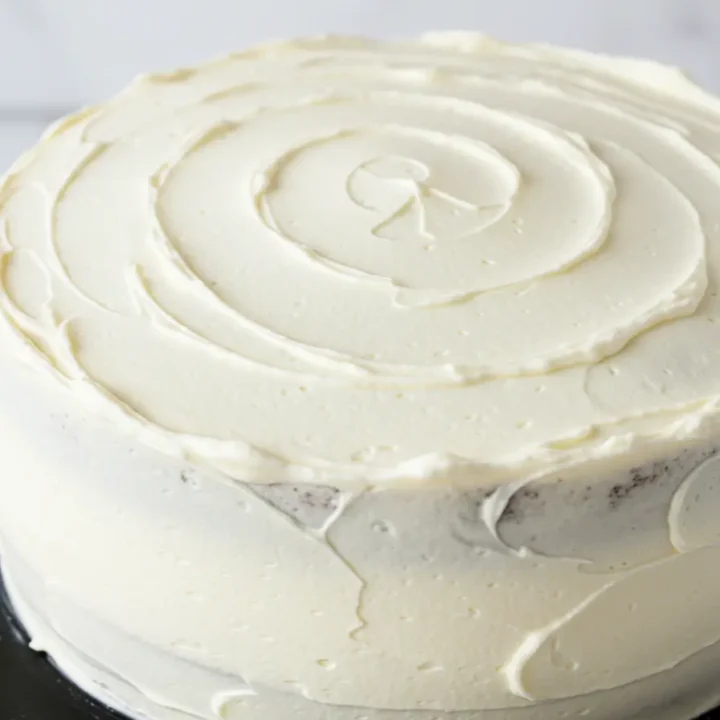
Spread the frosting all over the top and sides of the cake, making sure to cover every inch for a smooth, glossy finish.
If you’re feeling fancy, you can use a cake spatula to create soft swirls in the frosting or keep it simple with a smooth, clean look.
Whatever your style, this frosting will make your cake look like it came straight from a bakery!
3 Mistakes to Avoid When Making White Velvet Cake
Here are a few common mistakes that can trip you up, and how to avoid them for a flawless cake:
Skipping the Room Temperature Ingredients
It’s tempting to dive right in, but using cold butter, egg whites, or milk can mess with the texture of your batter.
Cold ingredients don’t mix well and can lead to a dense cake.
Let everything come to room temperature before you start , it makes a world of difference in getting that light and fluffy texture we’re after.
Overmixing the Batter
When it comes to cake batter, less is more!
Mixing too much can make the cake heavy and chewy instead of light and soft.
Once the dry ingredients are added, stir gently and just until combined. This helps maintain a soft crumb and keeps the cake from becoming too heavy.
Frosting While the Cake is Still Warm
You might be eager to finish your cake and dive into the frosting, but it’s important to let your cake cool completely.
Frosting a warm cake will make your buttercream melt right off, creating a mess. Give your cakes time to cool to room temperature on a wire rack before you start frosting. Trust me , patience pays off here!
What to Serve with White Velvet Cake
Want to take your white velvet cake experience to the next level? Here are some unique serving suggestions to make your dessert even more memorable:
Citrus Compote
Top your cake with a refreshing citrus compote, think orange or lemon. The bright, tangy flavors contrast perfectly with the sweetness of the cake and add a sophisticated twist.
Raspberry Sorbet
For a fresh and cooling contrast, serve your cake with a scoop of raspberry sorbet. The tartness cuts through the richness, making each bite feel light and refreshing.
Homemade Caramel Sauce
Drizzle a bit of warm homemade caramel sauce over the cake for a rich, indulgent finish. The buttery sweetness pairs wonderfully with the lightness of the cake.
How to Store White Velvet Cake
Room Temperature
If you plan to enjoy your cake within a day or two, store it at room temperature. Just cover it with a cake dome or place it in an airtight container to prevent it from drying out.
Refrigerate for Longer Freshness
If you need to keep it for a few days longer, pop the cake in the fridge. Keep it fresh by sealing it in an airtight container or wrapping it snugly in plastic wrap. This will keep the frosting intact and prevent it from drying out.
Freeze for Extended Storage
For even longer storage, freeze your cake! Slice it into individual portions and wrap each piece tightly in plastic wrap, then foil. This makes it easy to grab a slice whenever you’re craving something sweet
More Cakes to Try
If you’ve tried this cake or have any fun ideas of your own, drop a comment below! Whether it’s a question, a suggestion, or just a little love for the cake, your feedback means the world to me!
How to Make White Velvet Cake (Super Moist & Easy!)
Ingredients
Cake Ingredients
- 8 oz unsalted butter (2 sticks)
- 14 oz sugar
- 6 large egg whites fresh
- 14 oz flour
- 2 ½ teaspoon baking powder
- ½ teaspoon salt
- 1 teaspoon almond extract use clear for a whiter cake
- 1 ½ teaspoons vanilla extract
- 10 oz milk (295 ml)
- 2 oz vegetable oil (60 ml)
Frosting Ingredients
- 8 oz pasteurized egg whites room temperature
- 32 oz powdered sugar (4 cups)
- 32 oz unsalted butter (4 cups)
- ½ teaspoon salt
- 1 tablespoon vanilla extract
Instructions
- Preheat your oven to 335ºF (170ºC) and prepare two 8-inch round cake pans. You can grease the pans with butter and dust them with flour or use cake goop (a blend of flour, oil, and shortening) to ensure the cakes release smoothly once baked.
- In a separate bowl, mix together the milk, vegetable oil, and both vanilla and almond extracts. Set this aside for now so it’s ready when you move to the dry ingredients.
- Sift together the flour, baking powder, and salt in another bowl. This step is key for even distribution of the baking powder and to avoid any lumps.
- In a stand mixer, cream the softened butter on medium speed until smooth. Add the sugar and beat on high for about 5 minutes until the mixture is light, airy, and pale. This step creates the tender crumb we’re aiming for.
- Gradually add the egg whites one at a time, mixing on low speed. Let each egg white fully incorporate before adding the next. Ensure your egg whites have reached room temperature before using.
- Alternate adding the dry ingredients and wet ingredients to the butter mixture. Start with one-third of the dry ingredients, mix on low until just combined, then add half of the milk mixture and mix again. Repeat this process, ending with the remaining dry ingredients. Take care not to overmix the batter, or it may lose its light texture.
- Evenly divide the batter between the prepared pans and gently tap them on the counter to level the batter.
- Place in the preheated oven and bake for 25 to 35 minutes, or until a toothpick poked into the middle comes out without any wet batter.
- Allow the cakes to rest in their pans for 10 minutes, then gently move them to a wire rack to cool fully. This ensures they firm up and makes frosting easier.
- While the cakes cool, make the buttercream. In a stand mixer, combine the egg whites and powdered sugar, mixing on low speed to combine. Increase the speed to high and whisk until frothy.
- Add the butter in small chunks, allowing it to fully incorporate before adding the salt and vanilla extract. Beat the frosting until it becomes light, airy, and smooth.
- Once the cakes are cool, place one layer on a cake stand or serving plate. If you prefer, trim off any thin, browned layers from the top and bottom for a smoother finish.
- Apply a thick layer of frosting on top, then smooth it evenly. Add the second layer of cake and press gently to secure.
- Cover the top and sides with frosting, smoothing it for a clean, polished look.
- For a decorative touch, use a cake spatula to create soft swirls or keep it sleek and simple. Enjoy your beautifully frosted cake!
Notes
- Sifting your dry ingredients isn’t optional, it’s the secret to a light, airy cake!
- When adding the wet and dry ingredients, do it gently, and don’t overmix, a light hand ensures a fluffy texture.
- I like to trim both the top and bottom of my cakes if they rise unevenly, it helps create a smooth, even surface for frosting.
- Make sure the cakes are fully cooled before frosting them; it makes the whole process so much easier!
Nutrition Information:
Serving Size: 1 sliceAmount Per Serving: Calories: 890Total Fat: 52gCarbohydrates: 91gFiber: 1gSugar: 73gProtein: 3g